Supabase
This guide demonstrates how to setup Supabase for authentication and database functionality.
Overview
Supabase is a powerful tool for authentication and database functionality.
Setup Supabase
To get started with Supabase, follow these steps to register for a free account and integrate it with your Supastart application.
Sign Up
- Visit the Supabase website.
- Click on the "Start your project" button.
- Sign up using your email address, GitHub, or any other available method.
Create a New Project
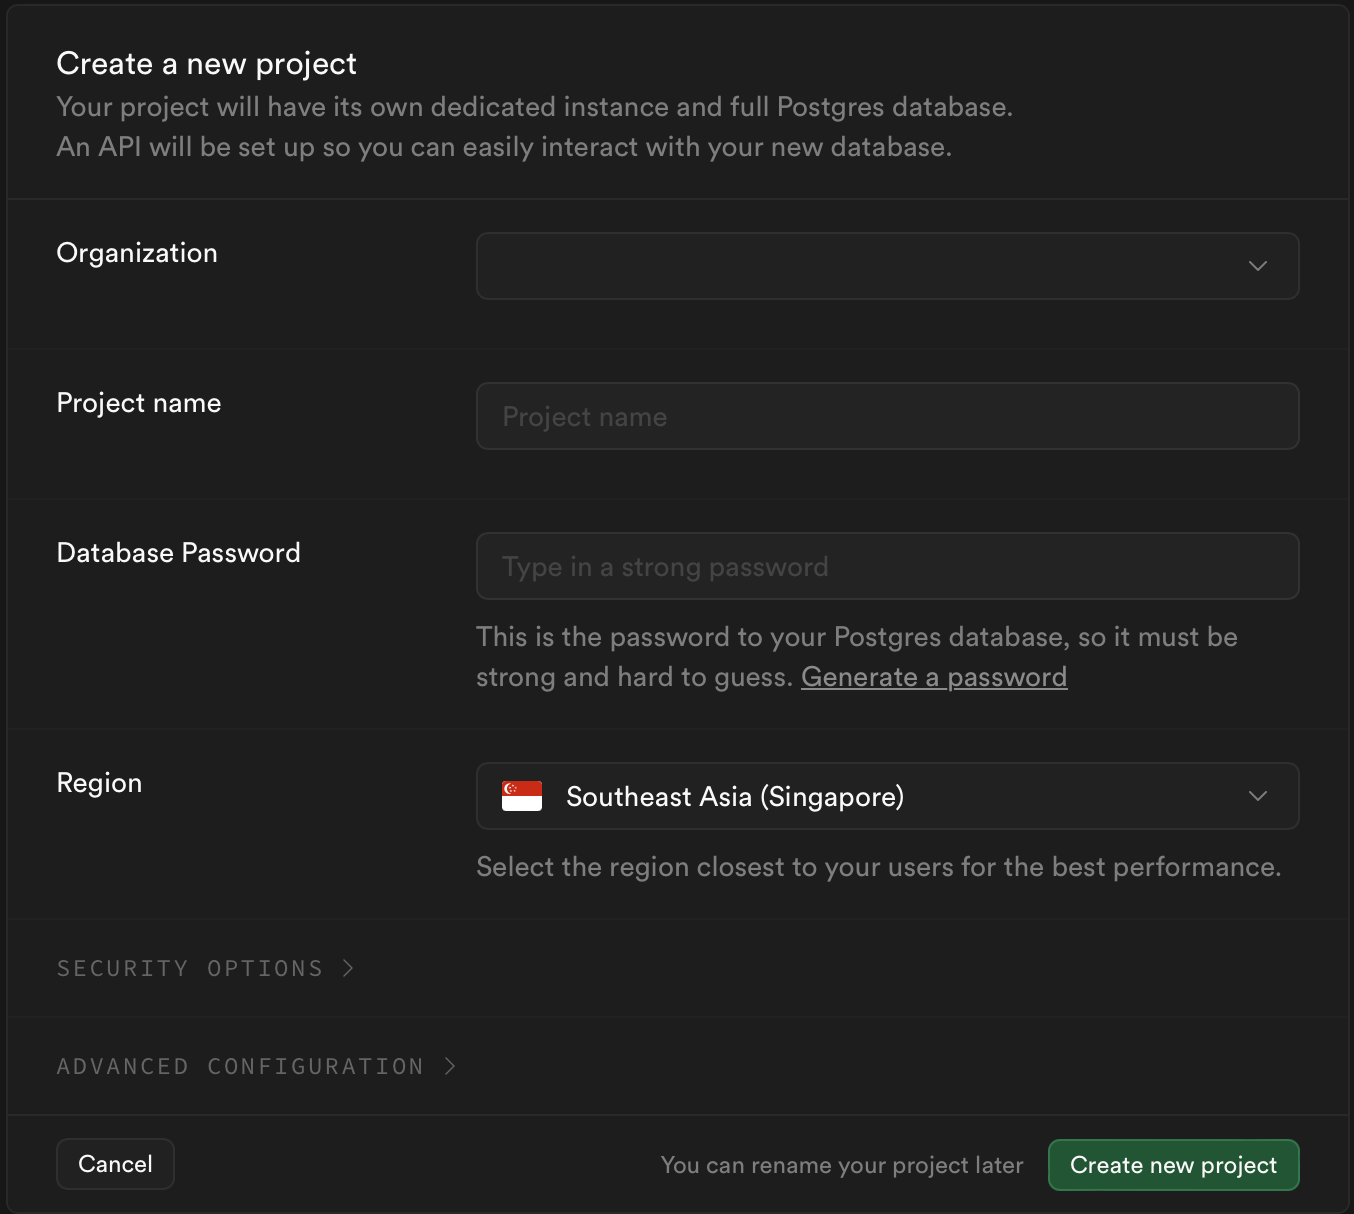
- After signing in, click on the "New Project" button.
- Fill in the required details:
- Project Name: Choose a name for your project.
- Organization: Select or create an organization.
- Database Password: Set a strong password for your database.
- Region: Choose a region closest to your target audience.
- Click on the "Create new project" button.

Wait for Project Initialization
- Wait for the project to be initialized. This may take a few minutes.
- Once the project is ready, you will be redirected to the project dashboard.
Get API Keys
- In the project dashboard, navigate to the "Project Settings" (gear icon) in the sidebar.
- Click on "API" in the Project Settings menu.
- You will find three important keys:
- Project URL: Your Supabase project URL
- anon public key: Your anonymous public API key
- service_role key: Your service role key (for server-side operations)

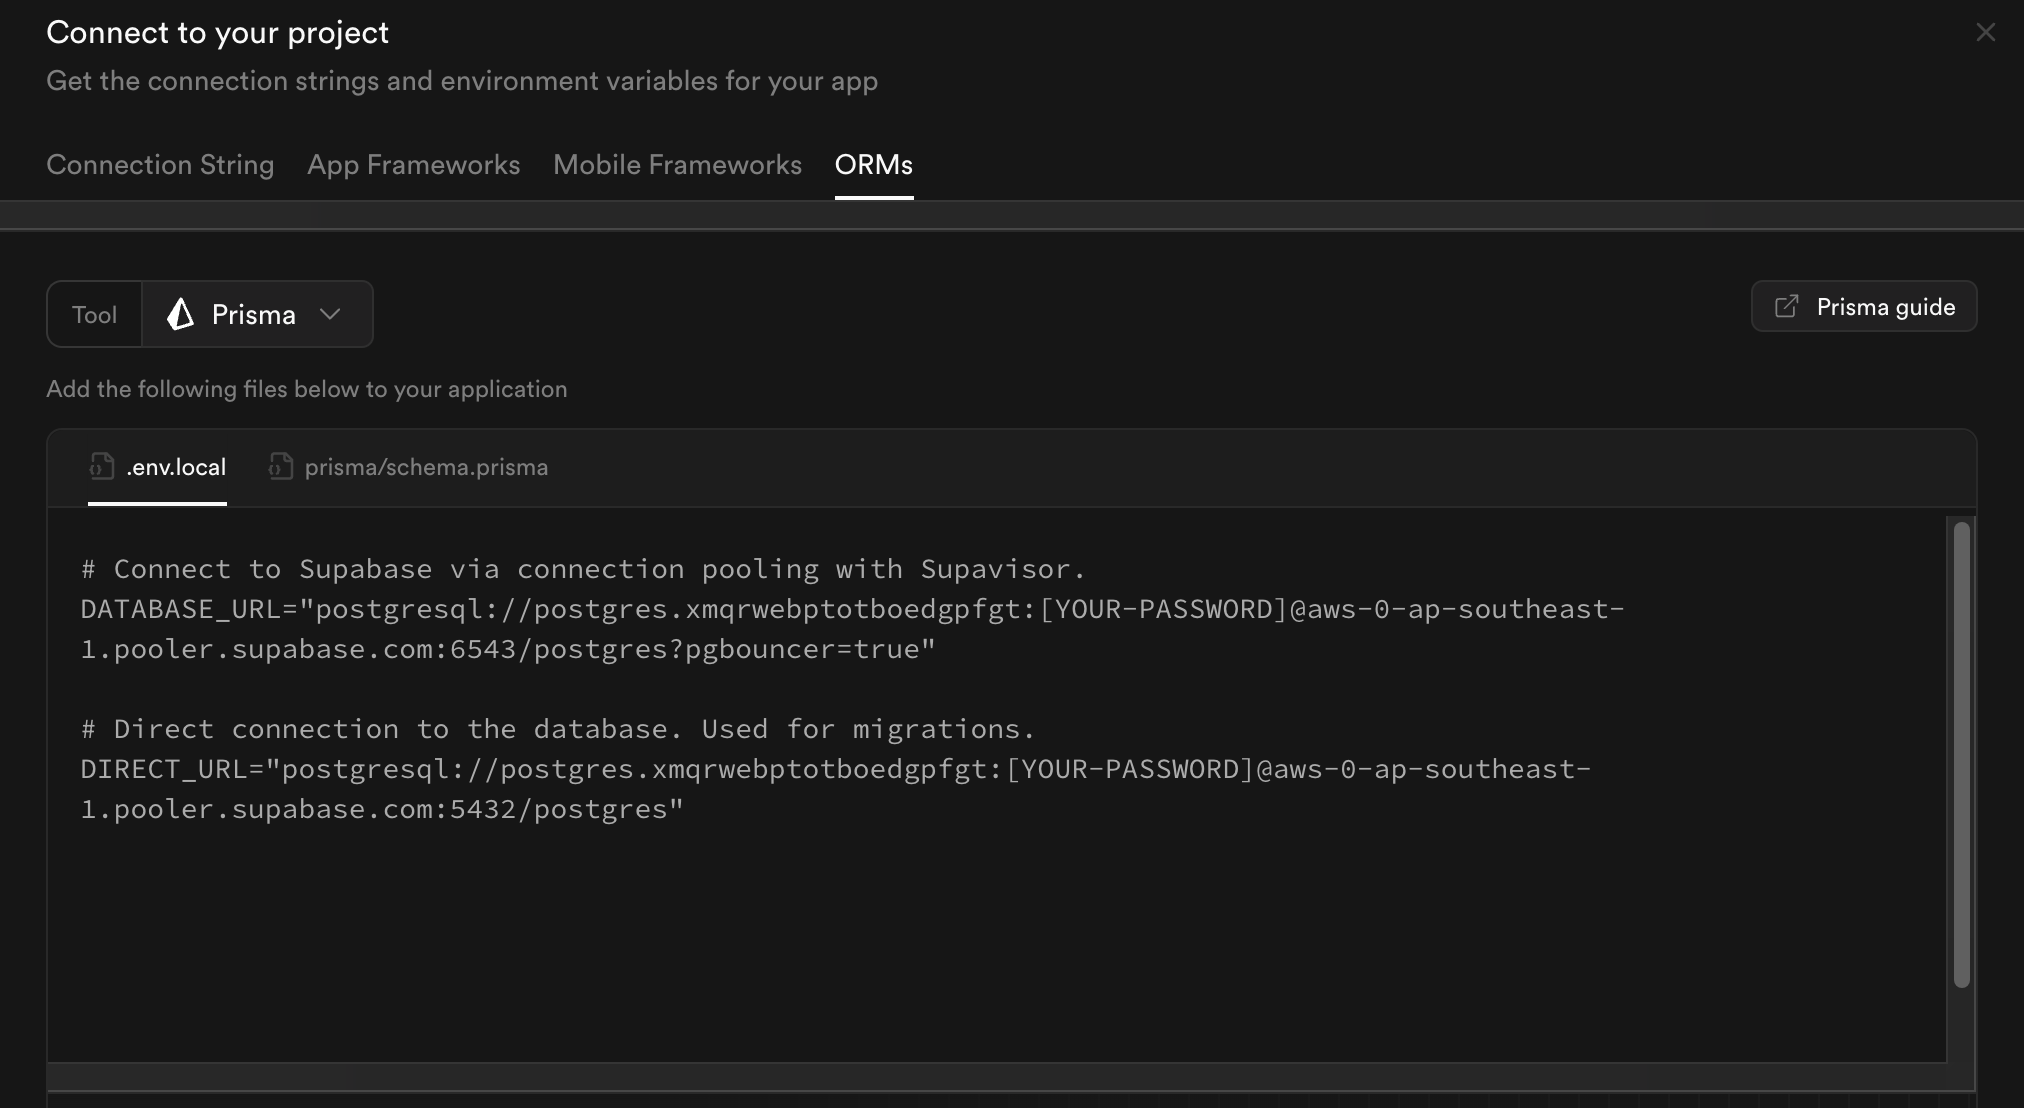
Set Up Environment Variables
-
Open your project's
.env.localfile. -
Add the following lines with your Supabase credentials:
# Supabase Configuration NEXT_PUBLIC_SUPABASE_URL=your-project-url NEXT_PUBLIC_SUPABASE_ANON_KEY=your-anon-public-key SUPABASE_SERVICE_ROLE_KEY=your-service-role-key # App URLs NEXT_PUBLIC_APP_URL=http://localhost:3000⚠️ IMPORTANT: The service role key has full admin access to your database. Never expose it in your frontend code or commit it to version control. Only use it in server-side code (like API routes).
Configure Authentication (Optional)
To enable Google authentication:
- In the Supabase dashboard, go to "Authentication" > "Providers"
- Enable Google provider
- Configure Google OAuth credentials:
- Create a project in the Google Cloud Console
- Set up OAuth consent screen
- Create OAuth client ID credentials
- Add authorized redirect URI:
https://[YOUR_SUPABASE_PROJECT_REF].supabase.co/auth/v1/callback
- Add the credentials to your
.env.localfile:# Google OAuth GOOGLE_CLIENT_ID=your-google-client-id GOOGLE_CLIENT_SECRET=your-google-client-secret CALLBACK_URL=https://[YOUR_SUPABASE_PROJECT_REF].supabase.co/auth/v1/callback
Set Up Database Tables
Supastart includes SQL migrations in the src/db directory that you can use to set up your database schema:
- Navigate to the SQL Editor in your Supabase Dashboard
- First, create the database schema:
- Open the
src/db/schema.sqlfile from your project - Copy the contents and paste them into the SQL Editor
- Execute the SQL to create the necessary tables and configurations
- Open the
- Then, seed the database with initial data:
- Open the
src/db/seed.sqlfile from your project - Copy the contents and paste them into the SQL Editor
- Execute the SQL to populate your database with initial data
- Open the
The schema.sql file will:
- Create necessary tables (profiles, teams, etc.)
- Set up the
user_dataview that joins auth.users with profiles - Create appropriate indexes and security policies
- Add triggers for automatic user status management
After that, the seed.sql file will populate your database with initial users, settings, and other sample data for testing.